![EduMe_primary_full_colour_light_bg_RGB.svg]](https://help.edume.com/hubfs/EduMe_primary_full_colour_light_bg_RGB.svg)
Watch a 1-min demo of Paths
What's in this article?
What are Paths?
Paths let you combine your existing enablement content into a progressive and structured journey, so your frontline always know what to do next, in the right order.
Whether you’re building a new hire onboarding programme, a skills progression track, or a role-specific training sequence, Paths removes the guesswork. Your teams move through content step by step, their progress is tracked at each stage, and you stay in control of who sees what.
Creating your Path
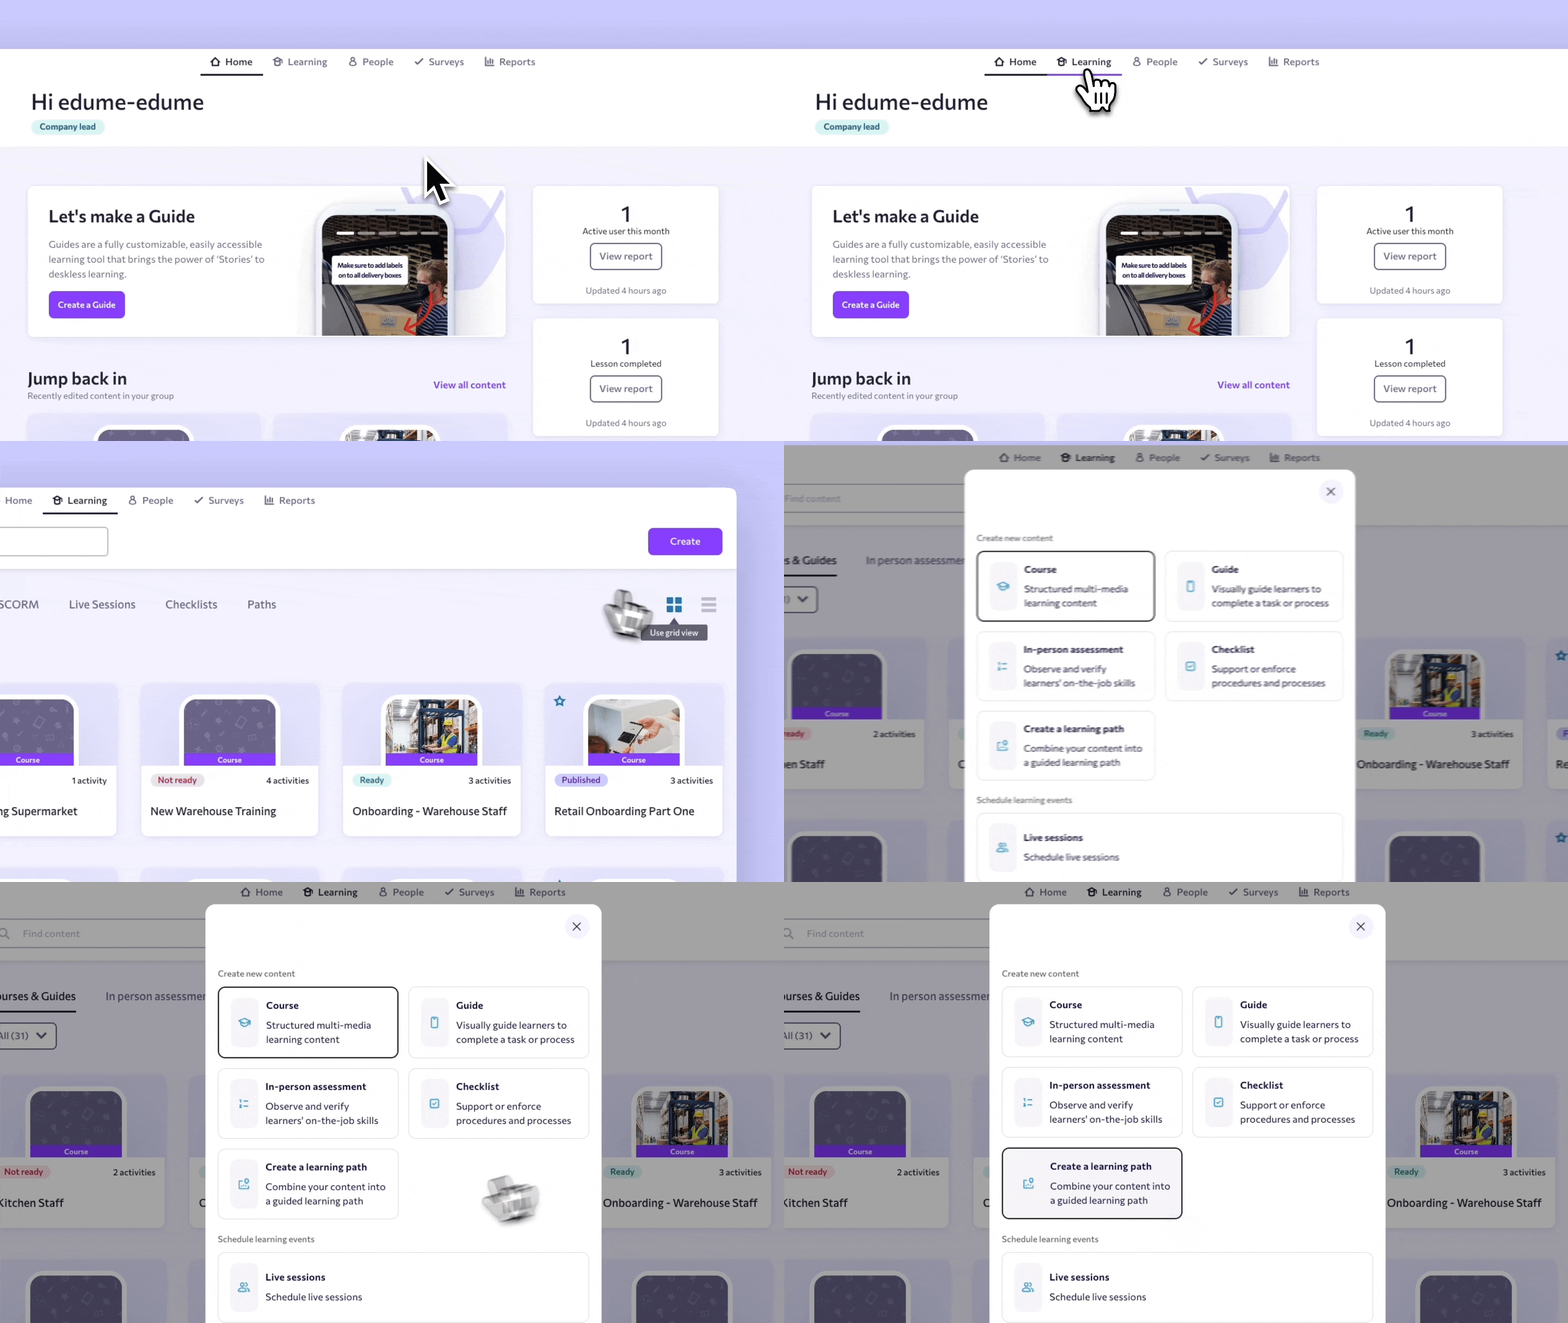
Step 1: Go to the Paths tab
- Click Learning in the top navigation bar.
- Select the Paths tab along the top of the content list.
You’ll see all existing Paths in your group here.
Step 2: Create a new Path
- Click the purple Create button in the top-right corner.
- In the modal that appears, select Create a path.
- Click Continue.
Your new Path opens automatically in the Path builder view, titled “Untitled path” with 0 items.
Step 3: Name your Path
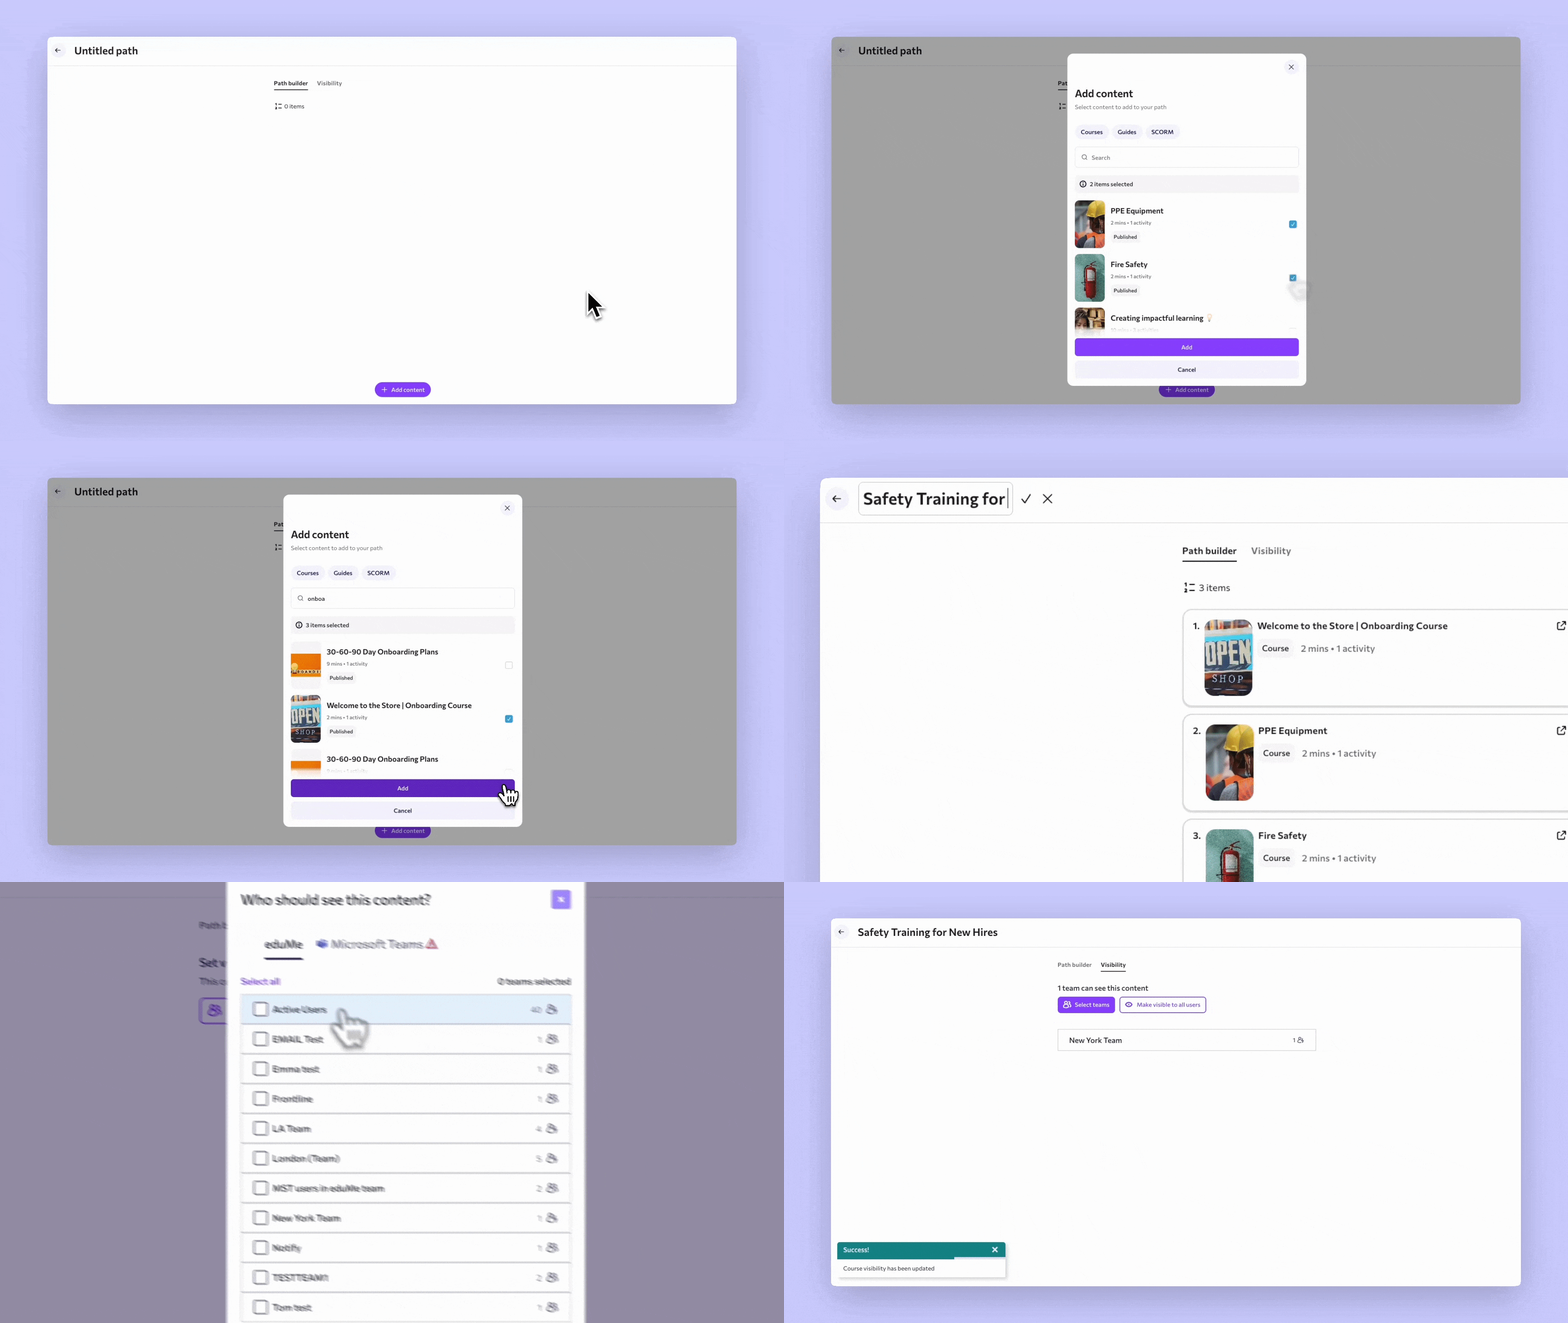
Click on Untitled path at the top of the screen to rename it. Give it a clear, descriptive name - for example, New Hire Onboarding or Warehouse Safety Programme.
Step 4: Add content to your Path
- Click the + Add content button at the bottom of the Path builder.
- Browse or search your existing content library and select the courses or guides you want to include.
- Repeat until all content items are added.
Each item in the Path is numbered and shows its content type (Course or Guide), estimated duration, and number of activities or steps.
Tip: Content items in a Path are completed in order and build on each other. Your teams move through them sequentially, with later items unlocking only after earlier ones are completed - so arrange them in the logical progression you want learners to follow.
Step 5: Reorder or remove content
- Reorder: Drag items using the handle icon on the left of each content card to change the sequence.
- Remove: Click the red trash icon on the right of any content card to remove it from the Path.
Path Visibility
Step 6: Set visibility (assign to your team)
Once you’re happy with the content, click the Visibility tab at the top of the Path.
You’ll see two options:
- Make visible to specific teams — Assign the Path to one or more specific teams. Only members of those teams will see it.
- Make visible to all users — Make the Path available to everyone in your group.
Choose the option that fits your use case and confirm your selection.
Note: Until you set visibility, the Path is not visible to any learners. It is published by default, but visibility must be set before your teams can access it.
What does your frontline see?
Step 7: What your frontline sees
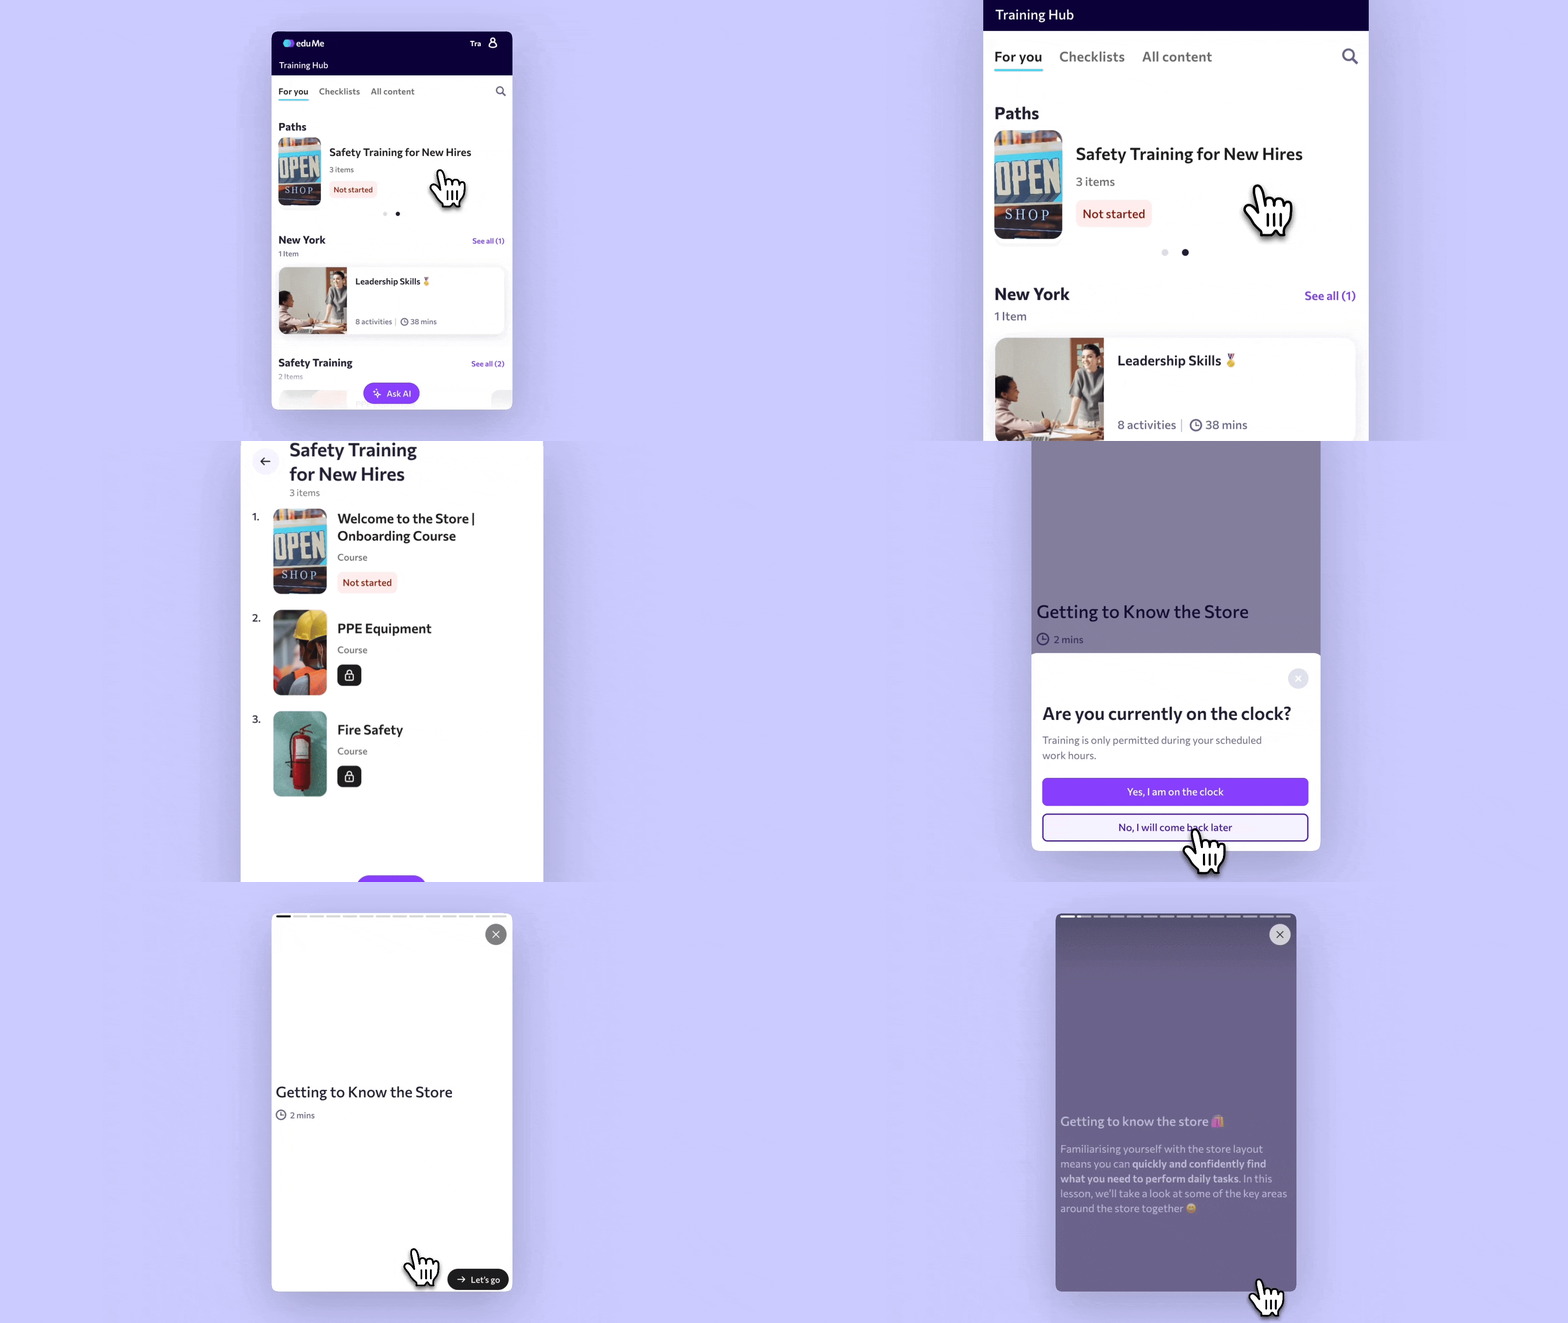
Once assigned, your frontline will find the Path in their enablement dashboard. They’ll see all the content items listed in order, with clear progress indicators on each item.
Once they’ve completed at least one item, a Continue path button appears so they can pick up exactly where they left off. Content that is only part of a Path (and not separately assigned) will appear exclusively within the Path - users won’t see it elsewhere in their content list.
Managing your Paths
Step 8: Managing existing Paths
You can view, edit, and manage all your Paths from Learning → Paths. Click on any Path card to open the Path builder and make changes - add or remove content, reorder items, or update visibility at any time.
Note: If you unpublish or delete a piece of content that’s part of a Path, it will be automatically removed from that Path. If the content is later republished, it will be restored to the Path automatically - as long as the Path itself hasn’t been edited in the meantime.