What's Covered
Using the slideshow lesson editor
Creating a conversational lesson
Using the conversational lesson editor
What is a lesson?
Lessons are one of three activity types that make up a course. You can use lessons to provide learners with relevant knowledge on a subject through a combination of text, image and video slides, as well as interactive quizzes to reinforce important information.
 Activity selector in eduMe
There are two lesson types to choose from: Slideshow and Conversational:
Slideshow lessons use a variety of full-screen, interactive slides which can be customised to your branding
Conversational lessons present content in informal, chat-style bubbles with a standardized look and feel
How to add a lesson
Here's a step-by-step guide on how to add a new lesson to a course.
Tip! We recommend keeping lessons to no more than 5 minutes. This ensures that learning content remains engaging, relevant and accessible to learners.
- In your course, create a new activity. If this is the first activity in the course, click Create an activity. Otherwise, click Add new activity
- Select Lesson. If this is the first lesson in the course, you will be asked to select Slideshow or Conversational. Choose your preferred style*, then click Next
- Title your lesson and select between an example or blank lesson. The example lesson provides a helpful template to get you started, or choose the blank lesson to start from scratch
- Click Create
 Adding a new lesson to a course
*Remember! Once you have selected your lesson type, all future lessons in this course will be created in the same style
Creating a slideshow lesson
Let's take a look at the slideshow lesson editor and how you can set up a slideshow lesson from a blank template.
Using the slideshow lesson editor
Slide overview panel
Use the slide overview panel on the lefthand side to add, reorder and navigate through slides
Slide preview window
The center view displays a mobile preview of the slide you have selected from the overview panel. You'll see the content update here as you create. Use the back and forward arrows to navigate through slides
Editing panel
Add and edit content in the editing panel on the righthand side. Here, you'll be able to add text, images and video, change the background and font color of your slides, and create quizzes.
You can edit the theme color and font color for the quiz in the first slide of the quiz. The edits will be automatically applied to all the slides in the quiz.
We can add up to four custom theme colors. Don't see yours in the editor? Reach out to support@edume.com with your HEX codes and we'll set this up for you! 🎨
Navigation bar
At the top of the window you'll see a navigation bar which includes:
- Activity status - once you have completed all components of your lesson, you'll be able to preview the lesson and publish it
- Copy preview link - once the lesson is ready, copy the preview link and paste into a new browser window to view the activity from a learner's perspective

- 'Done' button - click here to save your progress and return to the course page
Ready and Not ready status
You'll see a few green ![]() and red
and red ![]() dots around the activity editor. These dots indicate whether or not content still needs attention before the lesson can be published. Status dots appear on three levels:
dots around the activity editor. These dots indicate whether or not content still needs attention before the lesson can be published. Status dots appear on three levels:
- Overall lesson (in the top righthand side of the navigation bar). Once all components are completed, this will be marked in green. If there is unfinished content, this will be marked in red
- Individual slides (within the slide overview panel). Slides where all required content has been added will be marked in green. Slides containing unfinished content will be marked in red
- Content components (within the slide editing panel). While some components are optional, others are mandatory. Within each slide you'll find each text and media component has its own status. All components must be marked in green to make the lesson ready to publish
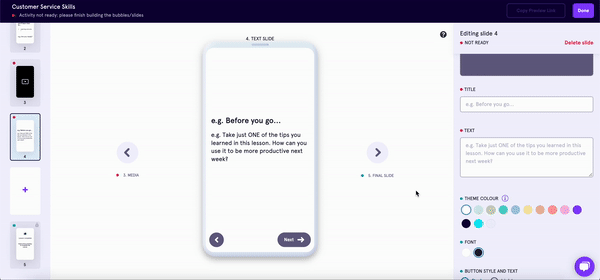
Slide types
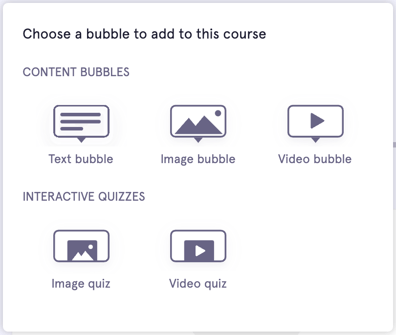
Slides make up your slideshow lesson content. There are a few fixed ![]() slides that we recommend keeping in all lessons. You can also choose between text, media and quiz slides:
slides that we recommend keeping in all lessons. You can also choose between text, media and quiz slides:
 Custom slide type options available in the slideshow lesson editor
Let your learners know what this lesson is about with a quick introduction
Note: Video slides are not available for eduMe app users
Find out more about creating quizzes in our article: Types of Quiz
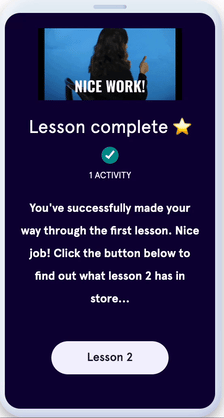
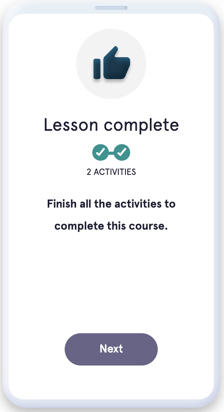
This is the last slide learners will see once they have completed all previous lesson content. Switch the toggle to Yes if you'd like to customise this slide, or keep this toggled to No to use the default text and imagery
See example of a customised final slide (left) and default final slide (right) below:
Creating a conversational lesson
Let's take a look at the conversational lesson editor.

Using the conversational lesson editor
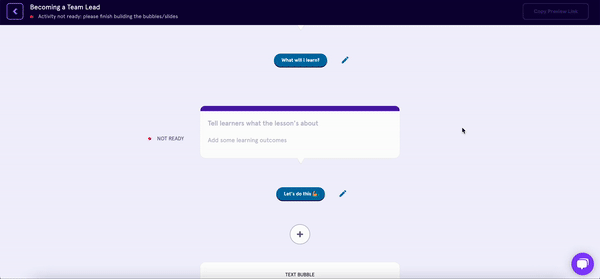
Conversational lessons are made of chat-style bubbles. Add text, images, videos and quizzes to these bubbles to create an engaging, informal lesson.
Bubble types
Content bubbles (text, image or video) can be used to share information with learners. Interactive quizzes (image or video) will take you to the slideshow editor where you can create quizzes for quick knowledge check-ins
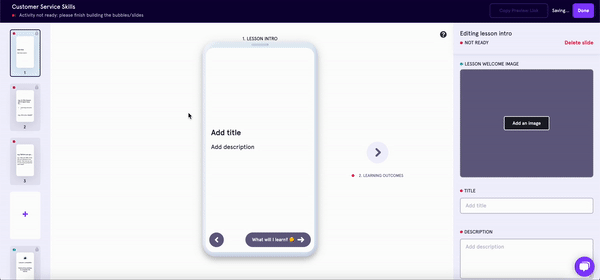
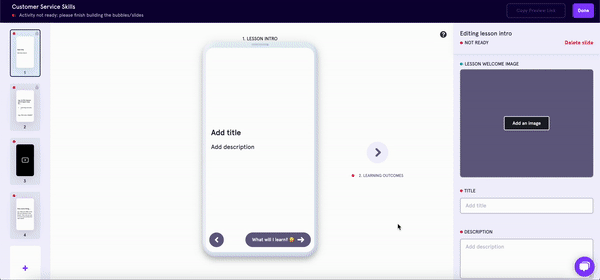
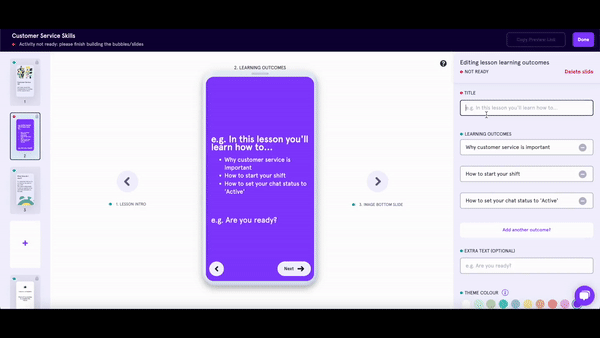
All conversational lessons will include three fixed bubble types: Lesson intro; Learning outcomes; and a Final slide.
Navigation bar
The navigation bar at the top of the editor includes:
- Activity status. Depending on whether or not all required components of the lesson have been created, the status will show as Ready
 or Not ready
  Read more about activity status in the above section: Ready and Not Ready Status
 - Copy preview link. Once the lesson is ready, copy the preview link and paste into a new browser window to view the activity from a learner's perspective
- Return to course button. Click here to return to the course homepage
Editing bubbles
Click the pen tool ![]() or 'Create' button to make changes to any bubble. You can add text, images and videos depending on your bubble type.
or 'Create' button to make changes to any bubble. You can add text, images and videos depending on your bubble type.
Click beneath text boxes to pull up Formatting tips. Here, you'll find guidance on how you can style your text to include bold, italic and bullet pointed or numbered text. You can also add emojis (which we encourage where you feel it's appropriate! 😎).
To save your changes, click the 'Save changes' button that appears in the top righthand corner of the navigation bar.
FAQs
Q: I can't see the option to delete a lesson. How do I do this?
A: You'll need to make sure your course is Unpublished before you can make edits to activities. Unpublish the course first, click the three dots icon on the lesson card, then select Delete lesson.
Q: How do I publish a lesson?
A: Once you have created your lesson, head back to the course home page to ensure all other activities have been completed. You'll be able to publish the course as a whole from here. If you're adding a new lesson to a published course, you can publish the lesson from the course homepage once its status is 'Ready'.
Q: How do I save my work?
A: In slideshow lessons, your course will be automatically saved as you made edits. In conversational lessons, click the 'Save changes' button for individual lesson components.