In this article
- Configure the content completion screen
- Manage content access
- Organising Content in the Widget
- Widget Configuration
- Best Practices
Important Update: Priority Courses Deprecation (October 2024)
As of October 2024, we have deprecated the Priority Courses feature. Previously, courses marked as "Priority" were displayed at the top of the widget. Moving forward, you can use sections to organise your learners' journey with more flexibility. Rather than limiting content to one priority level, you can now structure entire learning paths using multiple sections.
We recommend creating a dedicated section in your Knowledge Hub for priority or mandatory content, and placing this section at the top of your widget to maintain visibility for critical training.
Configure the content completion screen
- Create the course or a guide in eduMe.
- Once you've created your course/guides, make sure you update the Course Completion tab to toggle on the custom link feature and manually add in this deep link: beekeeper://deep-link/home
This will ensure that your learners are redirected to the Beekeeper app once they complete their course in eduMe
Manage content access
-
Open the Visibility tab within the course or guide.

-
You can choose to:
-
Keep content visible to all
All learners will have access to this content.
-
Make content visible to no one
No learners will have access to this content.
-
Select the specific teams you want to see this content.
Click Select teams. You can select from the list of available Beekeeper groups, for example:

-
-
Publish the course to make it available to users in the Beekeeper app.
The visible eduMe content will now surface on the Beekeeper app and users can access training visible to them via the widget “See all” button or in the widget itself, if the training has been organised for them in the Knowledge Hub.
Organising Content in the Widget
Your widget is a crucial tool for delivering relevant training to learners. By carefully organizing content within the Knowledge Hub, you can ensure that the right courses appear in the widget in an accessible and engaging format.
Accessing your Knowledge Hub 🎓
Content can be seamlessly distributed to users via our course visibility rules, ensuring the right teams receive the right content within just a few clicks.
Once you have created your course, and set your visibility rules at the course level you can begin to curate your Knowledge hub!
You can access the Knowledge Hub in two ways:
- Click on Curate content on the Knowledge Hub from the Visibility (All) tab of a course; or
- Click on Knowledge Hub from the Learning tab
To learn more about Knowledge Hubs and organising content in sections, check out this article.
Knowledge Hubs & Widget
Once you have set up your sections, you’re ready to set the visibility rules and one step closer to sharing with your users.
As mentioned above and as you will have already done, you will need to have first set visibility at the course level which then leads into your Knowledge Hub visibility and how courses will be shown to users’.
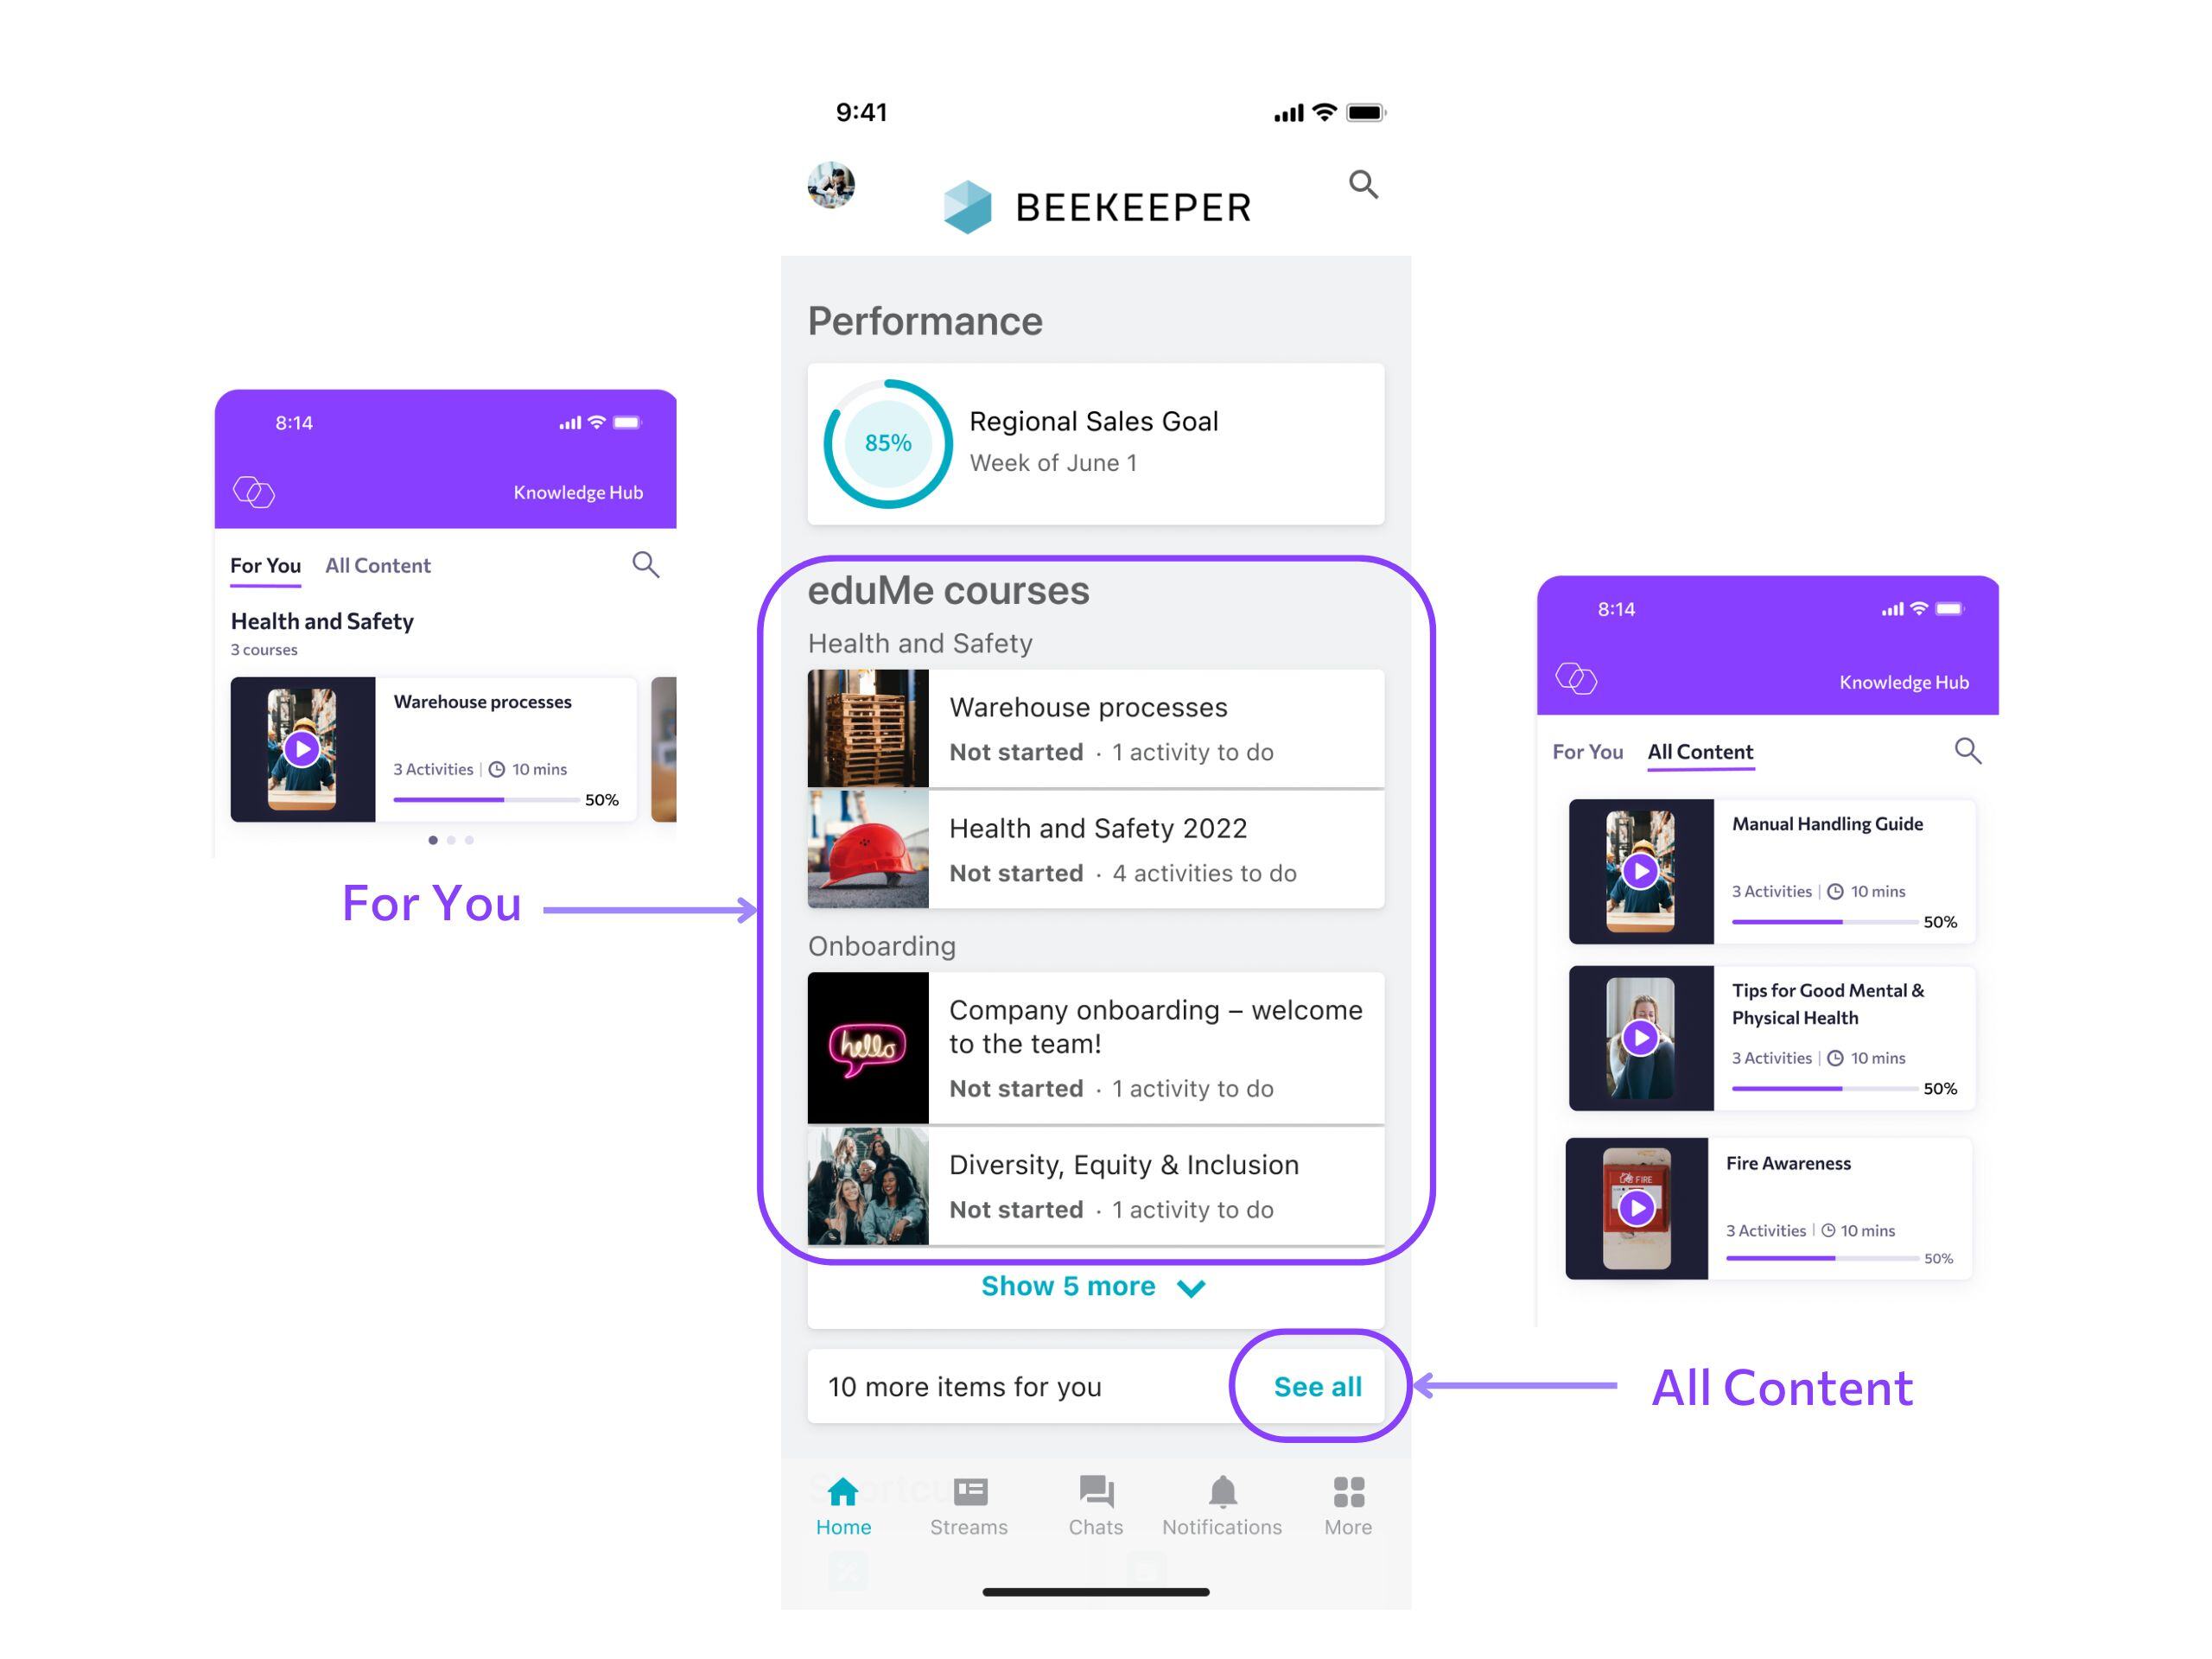
You can see in the screenshot below that Knowledge Hub courses will be split between a For you tab, and an All content tab and where courses appear will depend on your visibility rules.

A simple way to think of these tabs is:
- For you can be looked at as courses or guides that are required or are a priority for users in a particular role or team.
- This content will appear in the widget for the learner.
- All content can be any course or guide that may not be critical knowledge, but a good to know or something you may like users to have access to.
- This content appears after the user clicks on “See all”
Widget Visibility 👀
The next step is to understand how a course or guide ends up in either tab. As mentioned earlier, visibility starts at the course level and how you set this will affect how it shows to the user. There are two options:
- Make visible to all users: Selecting this option ensures that this course/ guide will appear in all users’ All content tab (accessible after clicking on “See all”)
- Select teams: Selecting specific teams means only these teams will see that content in their All content tab (accessible after clicking on “See all”)
Once course visibility is set, Section visibility then determines whether a course or guide appears in the widget (For you). Go to the Knowledge Hub and click Section visibility where you will have three options:
-
All users in the group: choosing this option means that for example if Select teams were given visibility at course level, then these team will see the course in the widget (For you).
-
Specific teams: this options limits visibility in the widget (For you) to these select teams and any other teams given visibility at course level will see this in the All content tab (accessible after clicking on “See all”).
For example.
- Customer Service course is made visible to all users (consisting of 4 teams in total)
- This course is added to the Customer Service section in the Knowledge hub where visibility is set to Specific teams and you select Team A and Team B
- Team A and Team B will see the course in the widget (For you), and Team C and Team D will have access to it via the All content tab (accessible after clicking on “See all”).
-
No one. Will not show in either tab for any users.
Widget Configuration
Your widget mirrors the structure of your Knowledge Hub, allowing you to organize your content into sections. Here's how the widget works:
- The widget will always display the top 2 sections of your Knowledge Hub that have outstanding training for the learner.
- Each section will show the first 3 pieces of content.
- Once a learner completes all the courses in the first section, the next available section moves up, making the second and third sections visible.
- Learners can access additional content by expanding the widget menu or clicking See all button.
Adjusting the Widget Display:
If you'd like to modify how many sections or content items are shown, feel free to contact our support team for customisation options.
Best Practices
Prioritize Content Based on Learner Needs
Since the first section of the widget receives the most visibility and engagement, use this space to display the most relevant content for your learners’ current stage in the lifecycle. For example:
- New Hires/Onboarding: For learners preparing for their first day, include courses like "Your First Shift" or "Onboarding Essentials" in the top section.
- Seasonal Content: You can also rotate content based on the time of year. Example: "Prepping for the Holidays" for retail teams.
You can drag and drop courses within a section to order them as needed.
Engaging Section Titles
Section titles should clearly indicate the content's purpose and be engaging. Use titles that guide the learner to the right information. Examples include:
- "Your First Delivery" for new drivers.
- "Getting Started" for onboarding.
- "Skill Up for Your Next Role" for upskilling and development.